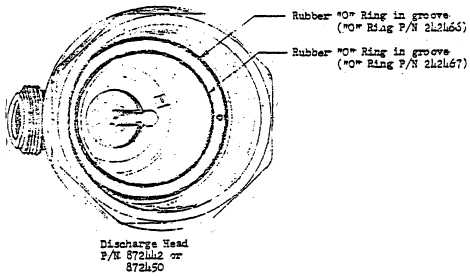
ASSEMBLY INSTRUCTIONS - DISCHARGE HEAD
WALTER KIDDE PART NO.
872442 (Grooved Nut)
872450 (Plain Nut)
Note:
These instructions are in addition to existing installation and maintenance
instructions.
Note:
Due to the possibility of slight burrs
on the O.D. of the existing cylinder
valves,
some
difficulty
may
be
encountered assembling the head.
This condition may occur on a very
small of installations. To remedy this
condition,
smooth
the
O.D.
of
cylinder valve with a piece of fine
emery cloth. Remove loose particles
of emery from surface of cylinder
valve.
Initial Installation
1.
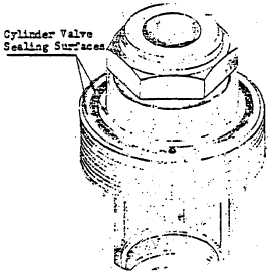
Wipe off cylinder valve sealing surface.
2.
Inspect to see that rubber rings are in their
grooves. Note that these rubber rings have been
lightly greased at the factory and should need no
further greasing.
3.
Keep head stationary and wrench-tighten until
head is snug.
After Discharge Head Has Been Removed and Before
Reassembling
1.
Wipe off cylinder valve sealing surface.
2.
Inspect to see that both rubber rings are in their
grooves. If one or both rubber rings are out of
their grooves, it is absolutely necessary that they
be replaced with new rubber rings greased per the
following paragraph. New rings are preferred
because they may be replaced much more rapidly
than old rings.
3.
Lightly grease rubber rings using a petroleum
base
grease
(for
example,
“Vaseline”,
“Petrolatum”, “Marfak No. 2 Heavy Duty”, “Regal
Starfak No. 2” or “Mobil Grease No. 5”). Wipe off
excess grease and install the rings in their grooves
with the fingers. Be sure rings are in place. It is
important to keep the rubber rings clean and free
from foreign particles during the greasing and
installation.
4.
Keep head stationary and wrench-tighten until
head is snug.
WALTER KIDDE & COMPANY, INC.
BELLEVILLE 9, NEW JERSEY
F-40696


