REPAIR INSTRUCTIONS USING FIBER GLASS MATERIAL
Figure 30. - Mat Lay-Up
10.
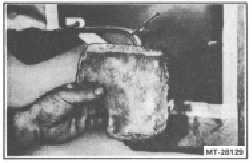
Allow the patch to harden; then pop it off (Figure
31) and remove the separating film.
Figure 31. - Backing Patch
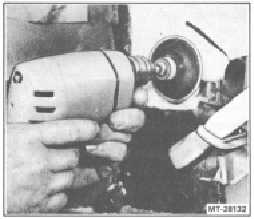
11.
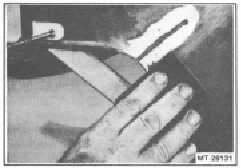
Working from the outside and using a file or
grinder, taper the edges of the damaged area at
an angle of no more than 45 degrees (Figure
32).
Figure 32. - Tapering Edges (Crack Shown - Typical)
12.
Remove flaky edges and feather the painted
surface back
about
1/2
inch
beyond
the
damaged area by hand-sanding or power-
sanding with 360 grit sandpaper (Figure 33).
Figure 33. - Sanding Exterior Damaged Surface (Crack
Shown - Typical)
13.
Clean the area with a dry cloth or air.
CAUTION - DO NOT WIPE WITH SOLVENT.
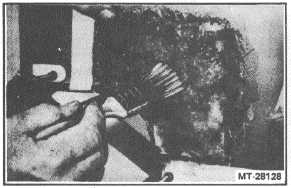
14.
Sand the underside of the repair area with 80 grit
(or less) sandpaper to create a rough bonding
surface approximately 2 inches from the center
of a crack (Figure 34) or 2 inches back from the
edge of a fracture.
Figure 34. - Sanding Underside of Repair Area (Crack
Shown - Typical)
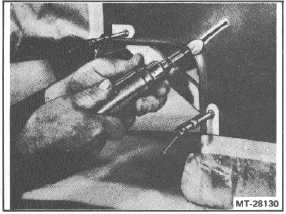
15.
Trim the perimeter and sand the mating surface
of the backing patch (Figure 35) with 80 grit
sandpaper (or less), checking for smooth fit to
the underside. Clean all surfaces with air.
CTS-4049
Page 11