TM 5-3895-370-14&P
NOTE
Tag and mark all wires before
removal.
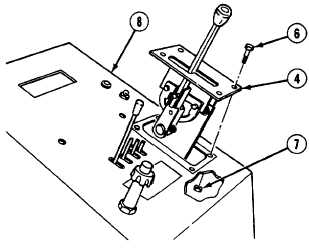
(3)
Remove two wires (5) from control lever and
linkage assembly (4).
(4)
Remove four screws (6) and nuts (7) and pull
control lever and linkage assembly (4) out of
console (8).
b. Installation.
WARNING
Adhesive sealant, MIL-S-46163, can
damage your eyes. Wear safety
goggles/glasses when using; avoid
contact with eyes. If sealant contacts
eyes, flush eyes with water and get
immediate medical attention.
NOTE
Apply sealing compound to threads
of screws prior to installation.
(1)
Install control lever and linkage assembly (4) in
console (8) and secure with four nuts (7) and
screws (6). Tighten screws 50 to 55 lb-ft (68-75
Nm).
(2)
Install two wires (5) on control lever and linkage
assembly (4).
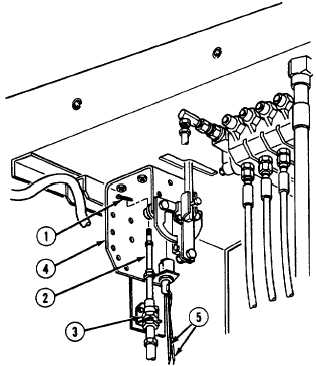
(3)
Place cable (2) in control lever and linkage
assembly (4) and secure with jamnut (3).
(4)
Install cotter pin (1) on end of cable (2).
NOTE
Follow-on
maintenance:
Install
console drawer (para 4-154).
END OF TASK
4-249