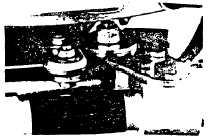
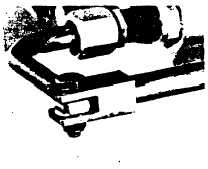
STEP 6/MOUNTING THE CYLINDER ASSEMBLY
FOR ALL ENGINES EXCEPT MERCURY/MARINER V6
For all engines except Mercury/Mariner V6
Insert the brass washer bushing on top of
the pre-assembled cylinder plate.
Bolt the connecting plate to the underside
of the cylinder plate. Note the instructions
on the connecting plate to ensure correct
orientation. Tighten securely.
Bolt the connecting plate to the bottom of
the tiller arm using washers top and bolts.
Seat the bolts completely and tighten nuts
securely.
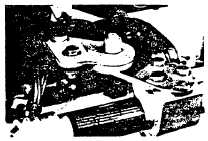
FOR MERCURY/MARINER V6 ENGINES (EXCEPT 300 HP)
For all Mercury/Mariner V6 engines insert
the brass washer bushing on the underside
of the cylinder plate.
Bolt the connecting plate to the top of the
cylinder plate.
Bolt the connecting plate to the top of the
tiller arm. Use both washers on the topside
to provide maximum clearance below.
Seat the bolts completely and tighten the
nuts securely. It may be necessary to do
this in two steps because of clearance. In
each case run the bolt through the tiller arm
first, then tighten the nut. Keep the wrench
on the bolt head to prevent it from backing
off.
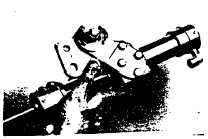
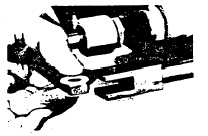
STEP 7/CONNECTING THE CYLINDER TO THE SUPPORT ROD.
Make sure to include the nylon spacers as
shown. Tighten the nut and bolt secure-
but do not overtighten.
MANUFACTURED BY
1650 W. 2nd AVE VANCOUVER B.C. CANADA V6J4H4 (604) 736-2831 TELEX 04-5088
Page 6